
Did you know that September is Save Your Photos Month? Join us for a month-long quest to protect and preserve your family’s lifetime of photos, film, and memorabilia. #SaveYourPhotos
 Day 1: Scan Your Photos
Scanning your printed photos and slides extends the lifetime of your pictures, creates a backup, and increases your ability to share and enjoy your memories.
Why Scan Your Pictures?
Scanning extends the lifetime of your photo. Your printed photos are decaying and deteriorating even under optimum storage conditions. When you make a digital copy, you have the ability to enhance the image, restore it to its original color and fix any damage. Digital photos can be migrated into new forms as technology changes, extending the life of your image beyond the original print.
Scanning creates a backup of your printed images. Right now, you have one copy of those prints with no back up unless you were particular about saving and cataloging your negatives. Your digital copy will be stored in your digital photo hub with the rest of your digital images and will get backed up during your normal workflow.
Scanning increases your ability to share and enjoy your photos. Families with printed photos face similar dilemmas. How will I divide my printed photos between my kids? Who gets what? What if they have storage space issues? I created scrapbook albums, and everyone in my family wants one! When you have digital copies of your photos (and your albums), your problems are solved. In their digital form, your printed photos can be shared via social media and online photo archives or put into slideshows and photos books.
How To Scan Your Pictures
Begin by reviewing your printed photos and slides and determine the quantity now that you have purged during the organizing process. Consider how you want to use these digital images so you can determine the minimum DPI that you need your images scanned. We recommend a minimum of 600 DPI depending on the original size of your image, and what you intend to use it for. For example, a 2×3 photo that you want to display on your wall as a canvas print may need scanning at a much higher DPI. If you are scanning slides, your DPI will be considerably higher and will be determined based on the end goal for your digitized copy. Work with your scanning service provider to help determine your needs.
Will you scan at home or use a service?
Local and online scanning services are an excellent choice for time-starved individuals and can be an affordable solution if you don’t have a quality scanner at home. Look for service providers that offer image enhancement and white glove service. Some big box stores ship your photos out of the country for processing. Do your homework!
If you scan your pictures at home, take extra care when handling your photos. Wipe your printed photos with a clean cloth and keep the scanner glass clean and dust free. Scanners will pick up dust, scratches, and smudges and magnify them in your image.
Do you have thousands of photos to scan? Consider buying a high-speed scanner or better yet, rent one. A high-quality, high-speed scanner can process your scans at an average of 50 prints per minute depending on the scanner. That’s roughly 2,000 – 3,000 photos per hour. Choosing a high-speed scanner for large jobs saves you time and money. Google ‘rent a scanner’ to find a scanner that suits your needs and budget.
 Day 2: We Are Overwhelmed
The statistics are staggering. In 2015 people took 1 trillion digital photos and that number grew to 1.7 trillion by the end of 2017. There are currently an estimated 4.7 trillion photos stored on computers and devices and growing! It’s also estimated that there are over 1.7 trillion paper photos stored in albums, attics & shoeboxes, waiting to be digitized and backed up.
What about your old home movies? Videotapes, like VHS, were very popular, and some 6 billion tapes were sold in the US with an average length of 2 hours each. That’s 12 billion hours of footage of new babies, first steps, weddings, barbecues, and graduations. But videotapes were never meant to be a permanent medium, and deterioration strikes them in as little as 20 years, even when stored under optimal conditions. Less than 1% of these memories have been transferred to digital, a much more durable and lossless format. Also, the ability to view these 6 billion tapes is not an option any longer since most devices have become obsolete.
Is it any wonder people are overwhelmed with their memory collections?
Being overwhelmed by your photos is normal but fixable! Stay tuned here all month for tips and strategies!
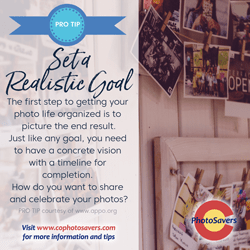
Day 3: Set A Goal
The first step to getting your photo life organized is picturing the end result. In other words, set a goal for yourself and your photos, videos, and memorabilia. Just like any goal, you need to have a concrete vision with a timeline for completion. Think ahead to when you have your entire photo and video collection organized and accessible.
 • How would you like to share and enjoy these pictures?
• Do you want a family yearbook with highlights?
• Do you want a photo gallery on your wall with milestone events?
• Do you want online photo albums that other members of your family can access?
• What about a video slideshow to enjoy with some popcorn?
Choose a few fun ways you plan to celebrate and share your photos – this is the fun part!
Next, think about who you plan to share your photos with and let them in on your plans. You are more likely to achieve your goal when you tell someone who can hold you accountable. You can do it!
 Day 4: Set Up for Success
Having a proper space in which to work can help set you up for success. Not only can you see everything you are working on, but you can also visually see your progress.
Find a Work Space
Let’s get down to business. Remember the saying “out of sight, out of mind”? Depending on the size of your photo collection, you may be working on this for a while. (And you probably have a lot of photos because remember we are all overwhelmed!) If everything is tucked away or hidden in closets and on computers, it will be easy to forget. You’ve made a commitment to organize your photos, so let’s get them into an area where you can work on them.
Designate a temporary workspace in your home that is visible and allows you to spread out. A large table in the corner of a room or a separate room is ideal and causes the least amount of disruption. When your project is visible, you’re more likely to remain focused on completion. If you set yourself up on your dining room table, then you may have to pack it up again when you want to sit the family for dinner! If space is an issue, take a photo of the locations where your photos are stored so you can create a vision board of what you are dealing with.
Hunt and Gather
Next, gather your memory collection into your workspace. Locate all photo albums, loose printed photos, memorabilia, kids artwork, negatives, slides, undeveloped film, memory cards, family artifacts, home movies (ex. VCR tapes, miniDVs, film, etc.). Determine the devices where you have photos stored, such as your smartphone, computers, and tablets. Resist the temptation to start sorting yet or reminiscing! There will be time for that later.
Ready, set, GO!
Day 5: Take a Photo Inventory
How many photos do you have in your digital collection? What about your print collection? What about film, video and other memorabilia? You need to know how many photos you have so you can plan the scope of your project and the time involved.
 Digital Photo Inventory – Taking a count of your digital photos can be done in a few clicks. Be sure to look for various formats for digital photos such as JPEG, TIFF, PNG, GIF, and Raw.
Print Photo Inventory – Printed photos are a little less exact. Professional photo organizers measure photos or weigh them when estimating. A one-inch stack of photos is approximately 100 pictures. This number may be less if you are working with older photos which may have a thicker backing. If you weigh boxes of photos, 6-7 pounds is the equivalent of 1000-1200 photos.
Don’t forget your slides – A circular slide carousel holds either 80 or 140 slides. If you are unsure about the slides you have, you can check out this rare slide guide.
Home Movie Inventory – When counting your home movie collection, you will find it helpful to count the various film and video formats. Not sure how to determine the formats? These two links will take you to The National Archives for information on how to identify them.
– Film Formats – https://www.archives.gov/…/motion-picture-film-identify-for…
– Video Formats – https://www.archives.gov/…/form…/video-identify-formats.html
And don’t forget to count your memorabilia!
What are your final numbers?
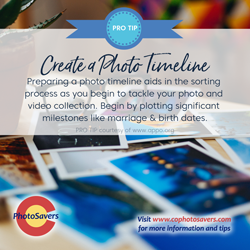 Day 6: Create a Photo Timeline
Most of our lives can be mapped into important milestones on a timeline, even though we may not know specific dates. Once a timeline is created, you will use this as a roadmap for indexing your photos during the sorting process. Trust us; you’ll be glad you took the time to complete this step!
Click here for more information: http://thephotoorganizers.com/organize-photo-life-family-timeline/
 Day 7: Collect Your Supplies
Having the proper tools will make your photo organizing project easier. We’ve asked members of the Association of Personal Photo Organizers what are their go-to tools:
– Cotton gloves: Fingertips contain an oily residue that will further deteriorate your delicate photos.
– Face Mask: If your heritage photos smell musty, or they were stored in an attic or basement, they may contain mold spores that you could find irritating during the sorting process.
– Soft-lead blue or black art pencil: As you sort photos you may want to include a date, year or name on the back of a photo until you can capture the details digitally once scanned. This pencil is not permanent and will not indent or harm your photo. Never use a pen to mark the back of your photo.
– Archival quality photo safe storage box: Choosing a good quality photo box will keep your photos safe, and aid in the sorting process. Contact a photo organizer in your area for recommendations for a safe photo box. A photo organizer will have sourced out a local supplier or may be able to provide you with one.
– Dental floss and hair dryer: If you have peel and stick (or magnetic) albums, some of your photos may be difficult to remove.
– Smartphone camera: If you have old albums with details on the page, you can take a snapshot of the page to keep the details with the photos.
– Sticky notes or index cards: These come in handy for creating a timeline during the sorting process.
© The Photo Organizers. Join the Photo Organizers newsletter list to get tips and resources right in your email box. Just go to https://www.subscribepage.com/TPOlist to sign up.
